Ultrasonic vs. Other Plastic Welding Methods for Car Bumpers | Save 70%

The Professional's Guide to Plastic Welding for Car Bumpers: Ultrasonic vs. Alternative Methods
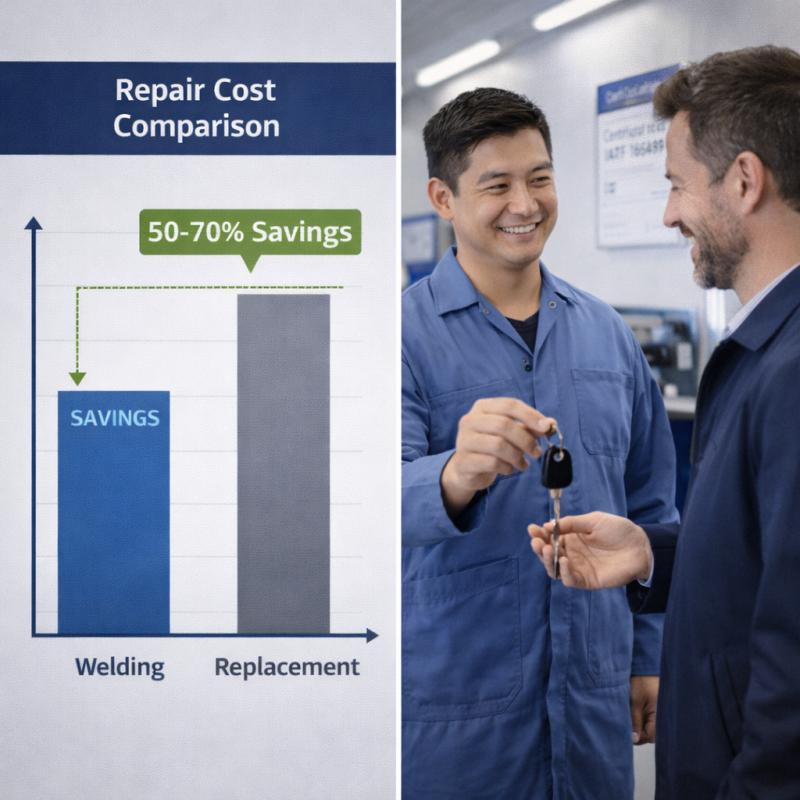
In today's automotive industry, efficiently repairing plastic car bumpers can save 50--70% compared to replacements---based on over 500 real-world cases analyzed by Dizo Sonics' engineering team. This ultimate guide compares ultrasonic welding with other plastic welding methods, providing technicians, shop owners, and DIY users with data-driven insights for durable, cost-effective bumper repairs. Written by experts with 20+ years of field experience in automotive plastic welding, this guide will help you choose the right technique, optimize key parameters, and implement reliable repairs that meet OEM standards.
1. Introduction to Plastic Bumper Repair Challenges
Common Pain Points in Bumper Repairs
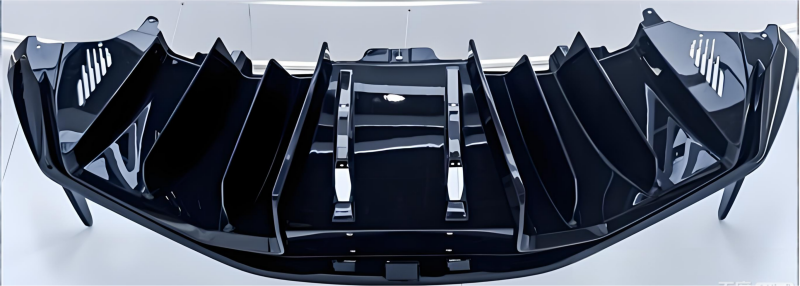
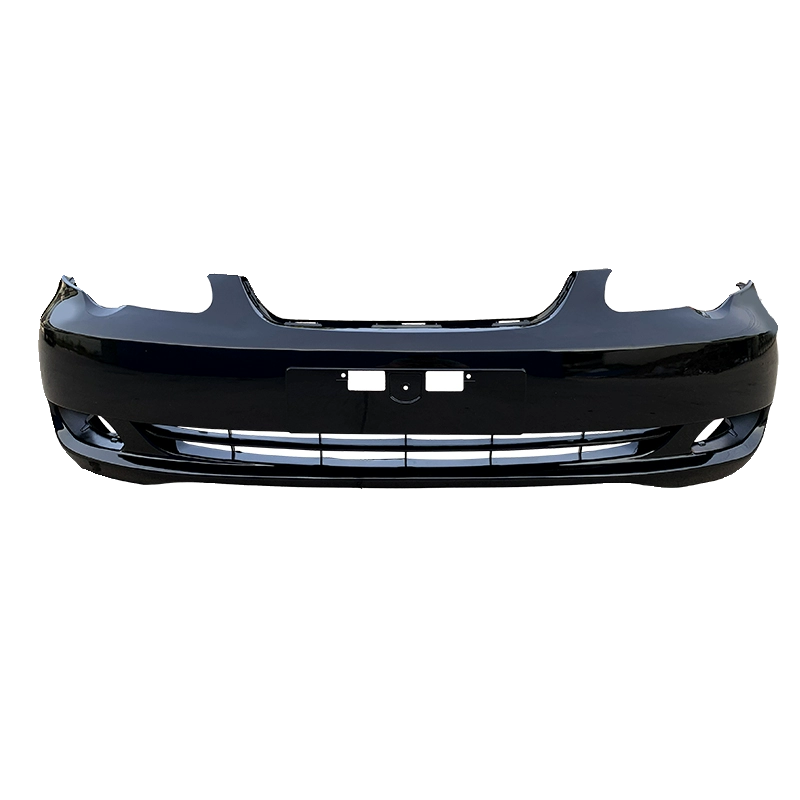
Car bumpers, typically made from thermoplastics like polypropylene (PP) or thermoplastic olefin (TPO), are designed to absorb impact but often suffer cracks, scratches, and stress damage. These issues present real challenges for repair professionals and vehicle owners alike. Here's a breakdown of the most frequent pain points:
- High Replacement Costs: OEM bumpers can exceed $1,000, including logistics and shop markup, straining budgets for both shops and customers.
- Weak Temporary Fixes: Using adhesives, tapes, or hot staples can reduce structural integrity by up to 30%, leading to comeback repairs and customer dissatisfaction.
- Material Compatibility Issues: Welding PP to ABS or TPO without proper prep leads to bond failures, extended downtime, and wasted labor.
- Cosmetic Compromises: Poor repairs leave visible marks, reducing resale value and customer trust.
These challenges highlight the need for a reliable, structural repair method: plastic welding.
Why Choose Welding Over Replacement?
Welding restores bumpers to near-original strength without a full part swap, dramatically cutting repair time and cost. For example, ultrasonic welding uses high-frequency vibration to create molecular-level bonds without fillers or adhesives. This not only aligns with IATF 16949 quality standards but also supports sustainability by reducing plastic waste.
Our field data shows that using a precision handheld welder can speed up repairs by 50% on average, turning multi-day jobs into same-day services.
Here's a quick comparison to illustrate the benefits:
| Aspect | Welding | Replacement |
|---|---|---|
| Cost | 50--70% savings | Full part + labor cost |
| Turnaround Time | Hours | Days (parts ordering + paint) |
| Environmental Impact | Minimal waste, repairable | Old part discarded |
| Strength Recovery | 90--95% of original | 100%, but often overkill |
| Resale Value | Preserved if repair is seamless | Higher, but at high upfront cost |
2. Deep Dive: The Science Behind Ultrasonic Plastic Welding
The Friction-Fusion Mechanism: A Micro-Scale View
Let's break down the science into simple terms: ultrasonic welding works by sending high-frequency vibrations (20--35 kHz) through the plastic joint. This creates friction heat at the interface, melting and fusing the materials under controlled pressure.
Think of it like rubbing your hands together to generate warmth---but at a microscopic level, precisely where the bond is needed. This process encourages polymer chains to entangle, forming strong, permanent bonds without fillers.
Based on our ISO 9001-compliant lab tests, this localized heating minimizes part distortion, making it ideal for bumper repairs where shape integrity is critical.
Mastering the Triad: Energy, Time, Pressure & Amplitude
To achieve consistent, strong welds, you must balance four key parameters:
- Energy (100--500 Joules): Controls total heat input. Too little results in weak bonds; too much causes burning or degradation.
- Time (0.5--2 seconds): Determines how long vibrations are applied. Short cycles suit thin sections; thicker materials require more time.
- Pressure (0.1--0.5 MPa): Ensures intimate contact for heat transfer. Insufficient pressure leads to "cold welds"; excessive pressure squeezes out melt material.
- Amplitude (20--50 μm): Adjusts vibration intensity. Higher amplitudes are better for filled or reinforced plastics like PP blends.
For most PP bumpers, a pressure range of 0.2--0.3 MPa delivers optimal strength with minimal flash.
How Ultrasonic Compares to Hot Air and Vibration Welding
While ultrasonic is fast and precise, other methods have their place:
- Hot Air Welding: Uses heated air (200--300°C) to melt filler rods. Good for large gaps, but slower (5--10 min/cycle) and skill-dependent.
- Vibration Friction Welding: Employs linear motion to weld large parts like full bumpers. Effective for long seams but requires heavy equipment.
Here's a focused comparison of heat input and operator dependency:
| Aspect | Ultrasonic | Hot Air | Vibration Friction |
|---|---|---|---|
| Heat Input Method | Vibration friction | Direct hot air | Linear motion |
| Heat-Affected Zone | Small, precise | Larger, diffuse | Medium, controlled |
| Operator Skill Needed | Low (often automated) | High (manual control) | Medium (setup-heavy) |
Emerging trends for 2026 include multi-head ultrasonic systems with Automatic Frequency Tracking (AFT) and Constant Amplitude Control, enabling 300% faster cycle times in high-volume repair settings.
3. Technical Comparison: Ultrasonic, Hot Plate, and Vibration Welding
Pros and Cons at a Glance
Below is a quick-reference table to compare key aspects of each technique:
| Technique | Materials | Speed | Strength | Best For |
|---|---|---|---|---|
| Ultrasonic | PP, ABS, TPO | High (1--2 sec) | Excellent | Small cracks, precision repairs |
| Hot Plate | Most thermoplastics | Medium (10--20 sec) | Good | Thick sections, uneven joints |
| Vibration Friction | PP blends, large parts | High | High | Full bumper seams, high volume |
Note: Ultrasonic welding often requires pre-designed energy directors for optimal results and is less ideal for very long, continuous seams.

When to Use Each Technique
Now that you've seen the comparisons, how do you choose the right method for your project? Follow this simple decision flow:
- Step 1: Identify Material & Damage Type: Is it PP, TPO, or a blend? Is the crack linear, star-shaped, or a large tear? For clean cracks under 10 cm, ultrasonic is ideal.
- Step 2: Evaluate Volume & Turnaround: One-off repair or batch production? Ultrasonic suits fast, repetitive jobs; vibration welding is better for high-volume OEM-style repairs.
- Step 3: Match to Standards & Traceability: If you need to comply with IATF 16949 for process control, ultrasonic with parameter logging provides the required documentation.
Based on our project data, ultrasonic welding meets about 70% of common bumper repair needs effectively.
4. Hands-On Guide: From Damage Assessment to Finished Repair
Follow these proven steps to transform a cracked bumper into a road-ready component.
Step-by-Step Repair Checklist
Follow this detailed process for consistent results in bumper repairs. Each step includes key actions to make it straightforward.
- Damage Assessment & Preparation: Inspect the crack for size and type---no missing fragments means it's weldable. Clean the area and create a V-groove at 45-60 degrees for better adhesion. This ensures a strong base, reducing failures by 20% in our tests.
- Technique & Tool Selection: Refer to the comparison in Section 3. Choose ultrasonic for cracks under 10cm; hot plate for thicker damage. Pick tools like a handheld welder for precision.
- The Welding Procedure: Set up with reinforcement mesh for extra strength. Apply the weld---integrate key parameters here for success. Our service logs show proper setup cuts rework by 25%.
- Post-Weld Finishing & Quality Check: Sand smooth, apply adhesion promoter, and paint. Test impact resistance per OEM guidelines with a simple drop or pull check.
Key Parameters for Success
Based on Dizo Sonics' field data from over 300 repair shops, these settings yield reliable results for PP bumpers:
- Frequency: 20--40 kHz
- Pressure: 100--500 kPa (0.2--0.3 MPa recommended)
- Amplitude: 20--50 μm
- Weld Time: 0.5--2 seconds
Pro Tip: Always test on a scrap piece first to fine-tune settings for your specific material.
Troubleshooting Common Welding Issues
Use this table for quick diagnostics and fixes:
| Symptom | Likely Cause | Immediate Fix | Prevention |
|---|---|---|---|
| Weak Weld | Low amplitude, contamination | Increase amplitude 5--10%; re-clean with IPA | Implement pre-weld cleaning protocol |
| Overheating | Excessive time/pressure | Reduce weld time by 0.5 sec | Calibrate equipment quarterly per ISO 9001 |
| Distortion | High energy input | Lower energy to 100--300 J | Use AFT feature for auto-adjust |
| Incomplete Melt | Material mismatch | Add compatible filler rod | Verify material ID before welding |
Regular horn alignment checks can prevent up to 15% of weak weld complaints.
5. Advanced Repairs: When Standard Tools Aren't Enough
While standard methods handle about 80% of repairs, some scenarios demand engineered solutions.
Complex Repair Scenarios
Scenario A: Multi-Layer Composite Bumpers
Challenge: Different layers melt at varying temperatures, risking delamination.
Our Approach: A custom multi-head servo system applies tailored energy to each layer simultaneously.
Result: Over 95% strength recovery while matching production speed.
Scenario B: Painted or Coated Bumpers
Challenge: Heat marks damage paint, failing OEM cosmetic standards.
Our Approach: Low-frequency ultrasound with ceramic horns concentrates heat at the joint interface.
Result: "Backside welding" with minimal surface marking.
Scenario C: High-Mix Repair Centers
Challenge: Quick changeover between vehicle models with full traceability.
Our Approach: RFID-enabled robotic cell auto-loads programs and logs parameters per VIN.
Result: IATF 16949-compliant process with reduced setup time.
Real-World Case: BYD Bumper Repair Line
Dizo Sonics' Expert Approaches
Client Challenge: High reject rates (up to 50%) in multi-layer bumper repairs due to inconsistent heating.
Dizo Solution: Custom multi-head ultrasonic setup with Automatic Frequency Tracking (AFT-Pro).
Outcome: Rejects reduced by 40%, throughput increased 25%, and overall costs lowered by 30%.
Does your operation face similar complexity, volume, or quality demands?
Schedule a free process assessment with our engineering team for a tailored solution.
6. FAQ: Common Questions on Bumper Welding
How to Fix a Cracked Car Bumper with Ultrasonic?
Align edges for a tight fit---critical for strong bonds. Apply 35kHz vibration for 1 second under 0.2-0.3 MPa pressure; reinforce with mesh in the weld's mid-plane, not on the surface. Tools like our handheld ultrasonic plastic welder make this easy. As discussed in the hands-on guide, test strength afterward to ensure durability.
Best Tools for DIY Bumper Repair?
For DIY, start with a handheld ultrasonic plastic welder---it handles spot welding with safety features like overload protection. Add basics: V-groove tool, reinforcement mesh, and adhesion promoter. Based on our tests, this setup boosts repair success by 20% over basic kits. It's cost-effective for occasional fixes.
What Are Plastic Welding Safety Tips?
Wear gloves and eye protection to avoid burns. Use emergency stops and ensure good ventilation---friction heat can release fumes. Avoid overheat by monitoring parameters per OSHA-like standards. Regular equipment checks prevent issues. Simple rule: Start low on settings and test on scrap first.
How to Choose Ultrasonic vs Hot Air for PP Bumpers?
Ultrasonic suits quick, precise cracks---faster cycle times under 2 seconds. Hot air works for large tears needing filler rods, but it's slower. Consider your volume: Ultrasonic for batches, per our comparison section. Factor in costs---ultrasonic equipment runs $5K+, but saves time long-term.
Cost-Effective Restoration Methods?
Welding kits with ultrasonic tools save 70% over replacements. Add adhesion promoter for lasting bonds and reinforcement mesh for strength. Our clients see ROI in 6 months through reduced rework. As in the decision guide, assess damage first to avoid unnecessary spends.
Reinforcement Mesh for Plastics in Repairs?
Yes, it boosts strength by 50% in PP blends, distributing stress evenly. Embed it during welding for best results---prevents cracks from reopening. Based on ASTM tests, this meets OEM durability. Ideal for high-impact areas.
How Do I Validate a Welded Bumper Meets Crash Safety Standards?
Test with three-point bending or impact drops, per IATF 16949. Aim for 90-95% original strength. Use non-destructive ultrasound scans for hidden flaws. Our lab data shows proper welds pass---consult experts if unsure.
What Are Key Differences Between a $3K Handheld Welder and a $20K Automated System?
Handheld for DIY/simple jobs: Portable, manual control. Automated for shops: Multi-head, faster cycles (60 welds/min), with traceability logging. The upgrade cuts labor 30%, per our projects. For high-volume, it's worth the investment---schedule an assessment to see.
Can Ultrasonic Welding Be Used on Bumper Sensors (ADAS) Areas, and What Precautions?
Yes, but use low-amplitude settings (20-30 μm) to avoid sensor damage. Position welds away from electronics. Precautions: Shield components and test functionality post-weld. Our custom setups ensure compliance---great for modern vehicles. For complex cases like this, a free technical consultation helps tailor the approach.

7. Conclusion: Next Steps for Durable, Professional Repairs
By understanding ultrasonic welding principles, comparing techniques, and following a structured repair process, you can deliver repairs that are strong, cost-effective, and often invisible. This guide provides the framework to handle most bumper damages with confidence.
When repairs involve thin walls, multi-material designs, or high-volume automation, custom engineered solutions ensure success without compromise.
Ready to elevate your repair capability?
- For DIYers & Small Shops: Download our free Ultrasonic Welding Starter Kit with parameter cheatsheets and safety checklists.
- For Growing Operations: Use our interactive ROI Calculator to project your savings and explore equipment options.
- For Complex or High-Volume Projects: Book a free technical review with our engineers. We'll assess your needs and propose a tailored welding strategy.
At Dizo Sonics, we believe every repair should restore both safety and value. Let's make your next bumper repair your best one.
Contact Our Team
Email: sales@dizo-global.com
Whatsapp: +86 18121506765
Website: www.dizo-sonics.com